
DIY Solar Panel Installation: The Ultimate Guide for Homeowners in 2026
Strategic Overview: The DIY Solar Landscape in 2026
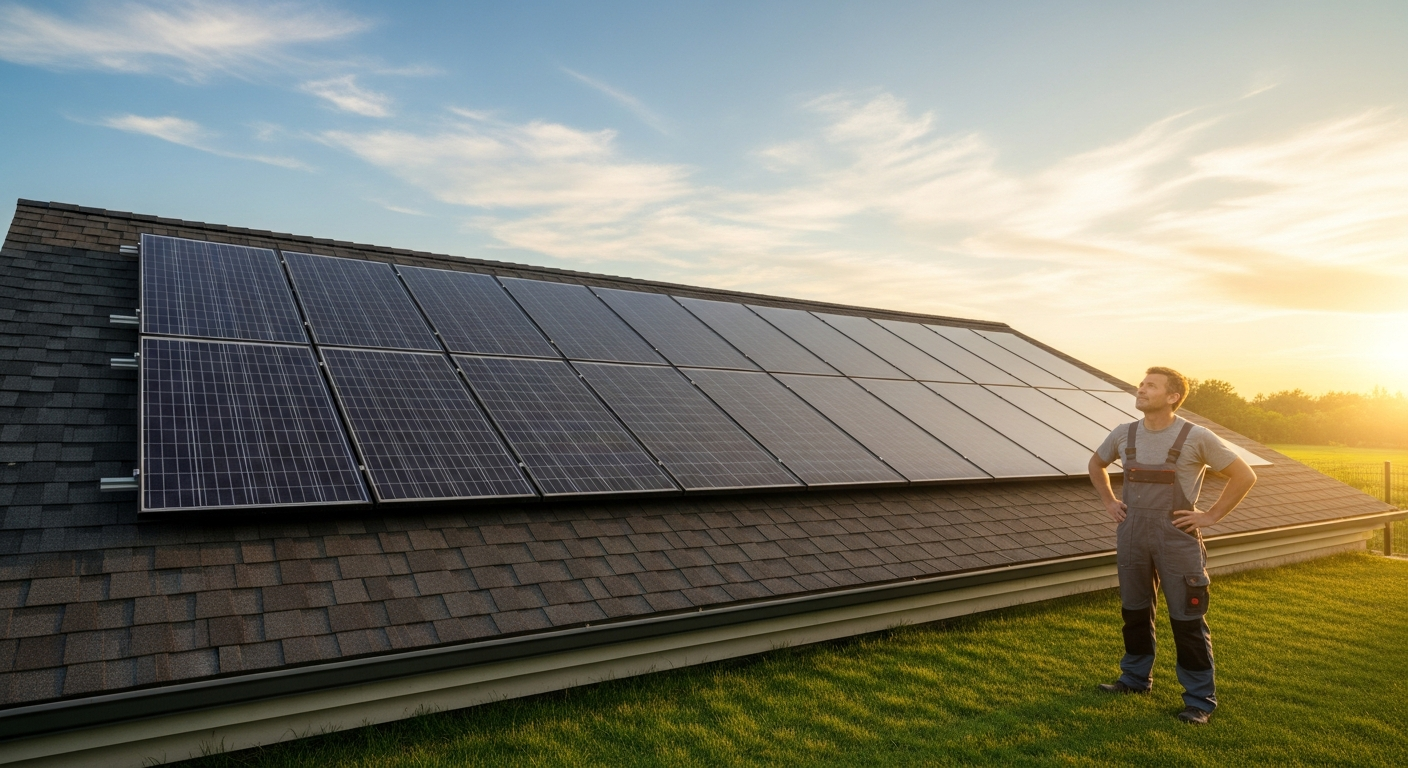
Welcome to the definitive guide for do-it-yourself solar energy in 2026. The landscape for the ambitious homeowner has fundamentally shifted. Gone are the days when DIY solar was confined to small, off-grid cabins. Today, we are in an era of unprecedented accessibility, driven by modular, high-efficiency systems and a growing desire for energy independence.
The market is no longer a binary choice between professional installation and a cobbled-together off-grid setup. The rise of integrated power systems from manufacturers like EcoFlow, Bluetti, and Victron has created a powerful middle ground. These systems offer near plug-and-play modularity, combining the inverter, charge controller, and battery management into a single, cohesive unit. This dramatically reduces wiring complexity and potential points of failure.
By 2026, the conversation has evolved to include grid-interactive hybrid systems. These allow you to power your home, store excess energy in advanced LiFePO4 batteries, and still sell power back to the utility. This is made possible by smart inverters that can intelligently manage power flow, prioritizing self-consumption and optimizing for time-of-use electricity rates. The financial calculus is more compelling than ever, with component costs continuing to fall while grid electricity prices climb.
This guide is engineered for the serious DIYer. We will move beyond basic concepts and delve into the technical specifications, engineering principles, and safety protocols required to build a robust, efficient, and compliant solar energy system for your home. From calculating voltage drop to understanding NEC rapid shutdown requirements, this is your blueprint for achieving true energy sovereignty.
Deep Technical Analysis: From Photons to Kilowatt-Hours
A successful DIY solar installation is built on a solid foundation of technical understanding. This section dissects the core components and sizing methodologies that separate a high-performance system from a hobbyist project. We will analyze the physics, establish 2026 efficiency benchmarks, and detail the process of system sizing.
The Physics of Photovoltaic Energy Conversion
At its heart, a solar panel operates on the photovoltaic effect. Solar photons, which are packets of light energy, strike a semiconductor material, typically silicon. This silicon is doped to create a p-n junction, which establishes a permanent electric field. When a photon with sufficient energy strikes an atom in the silicon, it excites an electron, freeing it from its atomic bond and creating an ‘electron-hole pair’.
The electric field at the p-n junction sweeps these free electrons to the n-side and holes to the p-side, preventing them from recombining. This separation of charge creates a voltage potential. When the front and back contacts of the cell are connected to an external circuit, a direct current (DC) flows. Millions of these cells are wired together in a solar panel, or module, to produce usable voltage and current.
In 2026, the dominant cell technology for residential use is Monocrystalline Silicon. These are made from a single, pure silicon crystal, identifiable by their uniform black color. Their ordered crystal structure allows electrons to move more freely, resulting in higher efficiency compared to Polycrystalline cells, which are made from melted silicon fragments.
2026 Efficiency Benchmarks for Core Components
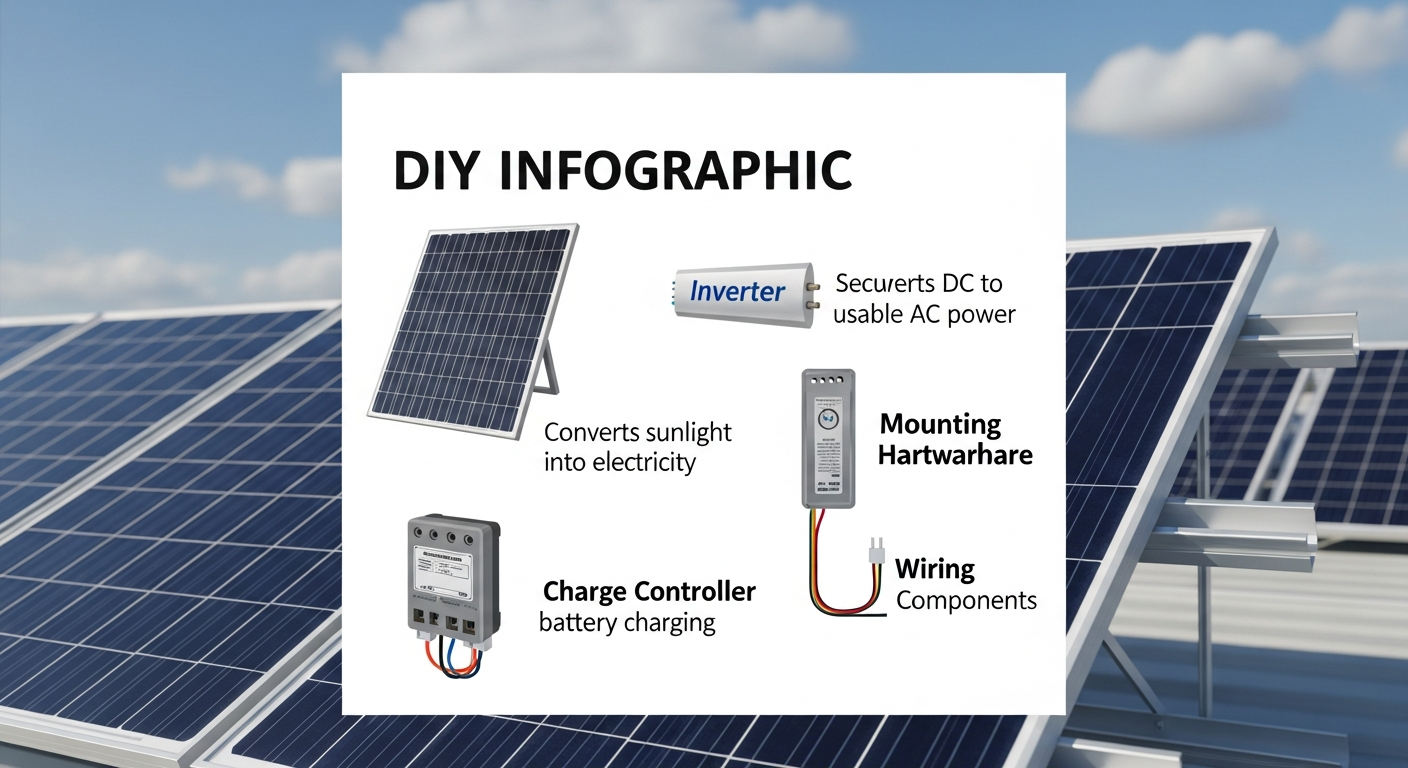
Photovoltaic (PV) Panels: Standard monocrystalline panels now feature advanced technologies like PERC (Passivated Emitter and Rear Cell), which adds a dielectric layer at the back to reflect unabsorbed light back into the cell for a second chance at absorption. The market leaders are TOPCon (Tunnel Oxide Passivated Contact) and HJT (Heterojunction) cells, which routinely achieve efficiencies of 22% to 24%. The next frontier, Perovskite-on-Silicon tandem cells, promising efficiencies over 30%, is beginning to enter niche markets.
Power Inverters: The inverter is the brain of your system, converting the DC power from your panels and batteries into the AC power used by your home’s appliances. Only Pure Sine Wave inverters are acceptable for a modern home system, as they produce clean power identical to the grid, essential for sensitive electronics. Inverter efficiency, the measure of DC to AC conversion, should be above 97%. Microinverters and DC optimizers offer panel-level optimization, ideal for roofs with partial shading, while modern string inverters offer cost-effective, high-reliability solutions for unshaded arrays.
Charge Controllers: For any system with a battery bank, a charge controller is non-negotiable. It regulates the voltage and current from the solar panels to prevent overcharging the batteries. The only technology to consider is MPPT (Maximum Power Point Tracking). An MPPT controller constantly adjusts its electrical input to harness the maximum possible power from the solar array, boosting energy harvest by up to 30% over older PWM technology, especially in cold weather or low-light conditions. Look for MPPT conversion efficiencies of 98% or higher.
Battery Chemistry: The industry has standardized on Lithium Iron Phosphate (LiFePO4 or LFP) for residential energy storage. Its advantages are overwhelming: a massive cycle life of 6,000 to 10,000 cycles, a safe thermal runaway temperature of ~270°C (far higher than other lithium chemistries), and the ability to be safely discharged to 90-100% (Depth of Discharge or DoD). This longevity and safety profile makes the higher initial cost a sound long-term investment.
System Load Calculation and Sizing Strategy
Proper sizing is the most critical step. An undersized system leads to frustration, while an oversized one is a waste of capital. The process is methodical.
1. Conduct an Energy Audit: Create a list of every appliance you intend to power. For each, find its power consumption in Watts (W) and estimate its daily run time in hours. Multiply Watts by hours to get daily Watt-hours (Wh). Sum the Wh for all appliances to find your total daily energy requirement. Don’t forget to account for the inverter’s self-consumption.
2. Size Your Solar Array: Your array must be large enough to replenish your daily energy usage. The key variable is Peak Sun Hours (PSH), which is the average number of hours per day that your location receives solar irradiance of 1,000 W/m². This is location-dependent (e.g., Arizona might get 6.5 PSH, Maine might get 4.0 PSH). The formula is:
Solar Array Size (W) = (Total Daily Wh) / (PSH) / (System Inefficiency Factor)
The inefficiency factor (typically 0.80-0.85) accounts for losses from wiring, inverter conversion, dirt on panels, and temperature.
3. Size Your Battery Bank: Your battery bank determines how long you can power your loads without any solar input (autonomy). Decide how many ‘days of autonomy’ you need. The formula is:
Battery Capacity (Ah) = (Total Daily Wh * Days of Autonomy) / (Battery Voltage * Battery DoD)
For a more straightforward kWh calculation: Battery Capacity (kWh) = (Total Daily kWh * Days of Autonomy) / (Battery DoD). With LiFePO4, you can use a DoD of 0.9 to 1.0.
4. Size Your Inverter: The inverter must be able to handle the maximum simultaneous power draw of your appliances. Add up the continuous wattage of all loads you might run at once. The inverter’s continuous output rating must exceed this sum. Crucially, it must also have a surge rating high enough to start motor-driven appliances like refrigerators or well pumps, which can draw 3-5 times their running wattage for a few seconds.

Engineering Specifications & Innovations in 2026
The DIY solar market is no longer about sourcing disparate components. It’s about choosing an ecosystem. Leading brands have developed integrated platforms that streamline installation and enhance performance, while new materials science promises to redefine panel efficiency.
Integrated Power Systems: EcoFlow, Bluetti, and Victron
EcoFlow & Bluetti: These brands have revolutionized the high-capacity DIY space with their modular power stations. Products like the EcoFlow DELTA Pro Ultra and Bluetti EP900 are not just batteries; they are all-in-one power hubs. They integrate a high-output pure sine wave inverter, multiple MPPT solar charge controllers, and a sophisticated Battery Management System (BMS) into a single chassis. Battery capacity is expandable with stackable LiFePO4 packs.
This approach drastically simplifies the most complex part of a DIY build: the high-amperage DC wiring between components. For the DIYer, this means fewer potential wiring errors, a smaller installation footprint, and a system that can be set up in hours, not days. Their focus on high PV input (up to several kilowatts) and home circuit integration makes them viable whole-home backup solutions.
Victron Energy: For the DIYer who demands professional-grade control and customization, Victron remains the gold standard. Their philosophy is component-based, but deeply integrated via the VE.Bus communication protocol. The heart of a Victron system is often a MultiPlus-II inverter/charger, which can seamlessly blend power from the grid, solar, and batteries.
This is paired with SmartSolar MPPT charge controllers and monitored by a Cerbo GX device. The Victron Remote Management (VRM) portal offers unparalleled data logging and remote system control. While requiring more technical knowledge to configure, a Victron system offers ultimate flexibility for complex off-grid, marine, or grid-interactive applications.
The Next Frontier: Perovskite and Advanced Cell Tech
While silicon-based cells are the current workhorse, the most exciting innovation on the horizon is the Perovskite solar cell. Perovskites are a class of materials with a specific crystal structure that are exceptionally good at absorbing light. Their key advantage is that they can be formulated as an ‘ink’ and printed onto surfaces, promising dramatically lower manufacturing costs.
The most promising application is in Perovskite-on-Silicon tandem cells. A thin, semi-transparent perovskite layer is placed on top of a traditional silicon cell. The perovskite absorbs high-energy blue light, while the lower-energy red and infrared light passes through to be absorbed by the silicon. This division of labor allows tandem cells to break through the theoretical Shockley-Queisser efficiency limit for single-junction cells, with lab prototypes already exceeding 33% efficiency. Commercial availability is the next major milestone for the solar industry.
Technical Comparison: Top DIY Solar Solutions of 2026
| Model / System | System Type | Max Solar Input | Inverter Output | Battery Capacity | Battery Chemistry | Key Feature |
|---|---|---|---|---|---|---|
| EcoFlow DELTA Pro Ultra | All-in-One Modular | 5.6 kW (expandable to 16.8 kW) | 7.2 kW Continuous, 10.8 kW Surge | 6 kWh (expandable to 90 kWh) | LiFePO4 | High-power stackable design for whole-home backup. |
| Bluetti EP900 & B500 | All-in-One Modular | 9 kW | 9 kW Continuous, 16 kW Surge | 9.9 kWh (expandable to 39.6 kWh) | LiFePO4 | Unmatched power output for demanding off-grid homes. |
| Victron MultiPlus-II System | Component-Based | Scalable (via MPPTs) | 3 kVA – 15 kVA+ (stackable) | User-Defined | LiFePO4 (or other) | Ultimate customization and pro-level monitoring/control. |
| Enphase IQ8 System | Microinverter-Based | Panel-level (up to 550W+ per micro) | Scalable (per microinverter) | Pairs with Enphase IQ Battery (3.84 – 40+ kWh) | LiFePO4 | Sunlight-only backup and superior performance on complex roofs. |
| Renogy LYCAN 5000 | All-in-One Power Box | 4.4 kW | 3.5 kW Continuous, 7 kW Surge | 4.8 kWh | LiFePO4 | Robust, pre-wired solution for off-grid cabins and workshops. |
Safety & Standards: Engineering for Compliance and Longevity
A DIY installation does not grant a license to ignore safety. Adherence to electrical codes and engineering best practices is paramount to protect your investment, your home, and your life. A well-built system is a safe system.
NEC Codes and Permitting
The National Electrical Code (NEC) is the benchmark for safe electrical installations in the US. Your project must comply with it, and your local Authority Having Jurisdiction (AHJ) will likely require a permit and inspection. Key articles to study are NEC Article 690 (Solar Photovoltaic Systems) and Article 705 (Interconnected Electric Power Production Sources).
A critical requirement in most jurisdictions is NEC 690.12 Rapid Shutdown. This rule exists to protect first responders. It mandates a way to rapidly de-energize the DC conductors on your roof to a safe voltage level (typically under 80V) within 30 seconds. This is usually achieved with module-level power electronics (MLPE) like microinverters or DC optimizers, or with specific rapid shutdown-compliant string inverters.
Proper grounding (earthing) and bonding of all metallic components—panels, racking, inverter chassis—is non-negotiable to prevent shock hazards. Conductor (wire) sizing must be calculated to handle maximum current and minimize voltage drop, ensuring both safety and performance.
Component Ratings and Fire Safety
Pay close attention to Ingress Protection (IP) ratings. An IP65 rating means a component is dust-tight and protected from water jets, making it suitable for outdoor installation in a somewhat sheltered location. Rooftop components like junction boxes and connectors should be IP67 or IP68, meaning they can withstand temporary or continuous immersion in water.
Fire safety is a primary concern, especially with high-power DC circuits. DC electricity is more difficult to interrupt than AC and can sustain a dangerous arc. Always use DC-rated circuit breakers and fuses. The adoption of LiFePO4 battery chemistry is a major safety advancement, as its superior thermal stability makes it far less prone to thermal runaway than older lithium-ion chemistries. Regardless, all power electronics like inverters and charge controllers must be installed with adequate clearance for heat dissipation as specified by the manufacturer.
Operational Pre-Installation Checklist
Success is determined before a single tool is picked up. Follow this engineering checklist to ensure your project is planned for safety and maximum performance.
- Complete a Detailed Energy Audit: Quantify your exact daily energy consumption in kilowatt-hours (kWh) and determine your peak simultaneous load in kilowatts (kW) to correctly size your inverter and battery.
- Verify Local AHJ Requirements: Contact your local building department to understand permit processes, inspection schedules, and specific code requirements for your jurisdiction, including interconnection agreements for grid-tied systems.
- Conduct a Thorough Site Survey: Use a solar pathfinder tool or a smartphone app (like Sun Seeker) to analyze the proposed array location for any shading from trees or structures throughout the entire day and across all seasons.
- Perform a Structural Analysis: Confirm your roof’s structural members can support the additional dead load of the solar array and racking, which is typically 2.5 to 4 pounds per square foot. Consult a structural engineer if you have any doubts.
- Finalize Component Sizing: Based on your audit and site survey, lock in the specifications for your PV array wattage, inverter capacity (continuous and surge), and battery bank kWh. Order components only after this is finalized.
- Develop a Comprehensive Wiring Diagram: Create a one-line diagram showing all components, wire gauges, and the location and rating of all overcurrent protection devices (fuses/breakers). Calculate voltage drop for all major wire runs and ensure it remains below 3%.
- Assemble a Safety Kit: Procure all necessary Personal Protective Equipment (PPE), including a fall protection harness and lanyard for roof work, Class 0 insulated lineman’s gloves, safety glasses, and a Class C rated fire extinguisher.
Advanced Technical FAQ
What is the difference between stringing panels in series vs. parallel?
Connecting panels in series (positive to negative) adds their voltages together while keeping the current the same. This is useful for achieving the high voltage needed to operate a string inverter or MPPT charge controller efficiently. However, if one panel is shaded, its reduced current output will bottleneck the entire string’s performance. Connecting panels in parallel (positive to positive, negative to negative) adds their currents together while keeping the voltage the same. This requires thicker, more expensive wiring to handle the higher amperage but makes the system more resilient to shading, as one shaded panel won’t affect the others. Most modern systems use a combination of series and parallel connections to optimize voltage and current for the charge controller’s input window.
Why is a Pure Sine Wave inverter critical, and what is THD?
A Pure Sine Wave inverter produces AC power with a smooth, periodic oscillation that is identical to or cleaner than grid power. This is essential for modern electronics, including laptops, LED lighting, variable-speed motors, and medical equipment. A cheaper Modified Sine Wave inverter creates a blocky, stepped approximation of a sine wave. This ‘dirty’ power can cause sensitive electronics to buzz, malfunction, or suffer permanent damage. Total Harmonic Distortion (THD) is the metric used to measure this distortion. A high-quality pure sine wave inverter will have a THD of less than 3%, while a modified sine wave inverter can have a THD of over 20%.
Can I connect my DIY system to the grid, and what is an Interconnection Agreement?
Yes, but it requires strict adherence to utility and legal requirements. A grid-tied system must use a UL 1741-certified inverter, which contains anti-islanding protection to automatically shut down when it senses a grid outage, protecting utility workers. You must apply for and sign an Interconnection Agreement with your local utility company. This legal contract specifies the technical requirements, safety standards, and financial terms (such as net metering) for connecting your system to their grid. A DIY installation for a grid-tied system will almost certainly require a licensed electrician to make the final connection and a formal inspection by both the AHJ and the utility.
How does temperature affect solar panel efficiency and battery performance?
Temperature has a significant, and often counterintuitive, effect. Solar panels are more efficient when they are cold. All panels have a Temperature Coefficient of Pmax, typically around -0.35%/°C. This means for every degree Celsius above the standard test condition of 25°C (77°F), the panel’s maximum power output drops by 0.35%. On a hot summer day, a panel’s surface can reach 65°C, resulting in a performance loss of over 14%. For batteries, the optimal operating temperature is also around 25°C. Extreme cold can dramatically reduce a battery’s available capacity and ability to accept a charge, while excessive heat will accelerate degradation and significantly shorten its lifespan.
What is ‘Rapid Shutdown’ and how is it implemented in a DIY system?
Rapid Shutdown is a safety requirement from the NEC (Article 690.12) designed to protect firefighters. In an emergency, they need to be able to de-energize the high-voltage DC conductors on a roof quickly. The rule mandates that conductors within the array boundary be reduced to 80 volts or less within 30 seconds of initiation. For a DIYer, the most common ways to achieve compliance are by using microinverters at each panel (which convert DC to AC on the roof) or by using DC optimizers paired with a compatible, rapid shutdown-compliant string inverter. These module-level devices can be signaled to shut down, isolating each panel and rendering the array safe.
📥 Associated Resource:

El Kouriani Abde Civil Engineer & Founder of SolarKiit
El Kouriani Abde is a seasoned Civil Engineer and Project Manager with over 21 years of field experience. As the founder and publisher of SolarKiit.com, he leverages his deep technical background to simplify complex renewable energy concepts. His mission is to provide homeowners and professionals with accurate, engineering-grade guides to maximize their solar investments and achieve energy independence.